
Showing posts with label 5 mins. Show all posts
Showing posts with label 5 mins. Show all posts
Thursday, September 25, 2014
Tuesday, September 23, 2014


Saturday, September 13, 2014
Tricolour Flower


Dee-Litefully Yours,
Diana
Friday, August 22, 2014
Fun Fold Friday - Lets use some DSP
I am back with an other Fun Fold Friday!I have been having trouble using my DSP as I just don't know what to do with it, so I have made it my goal over the next few months to use up a bunch of my DSP and with cards like this that won't be hard! I have lots of pictures today so lets get to it!

- DSP cut at 5 1/2 X 12
- score at 2, 4, 8 and 10
- fold in at the 4 and 8" marks and then fold back out at the 2 and 10" marks

- open up the card and measure down 2 3/4" from the top of the card along the outside edges
- cut from the top of the 4 and 8" marks to where you marked on the outside edge, save your scraps
- add your outer oval tab and sentiment (I used my new High Five stamp set for this one) and I embellished with candy dots (love those things!)
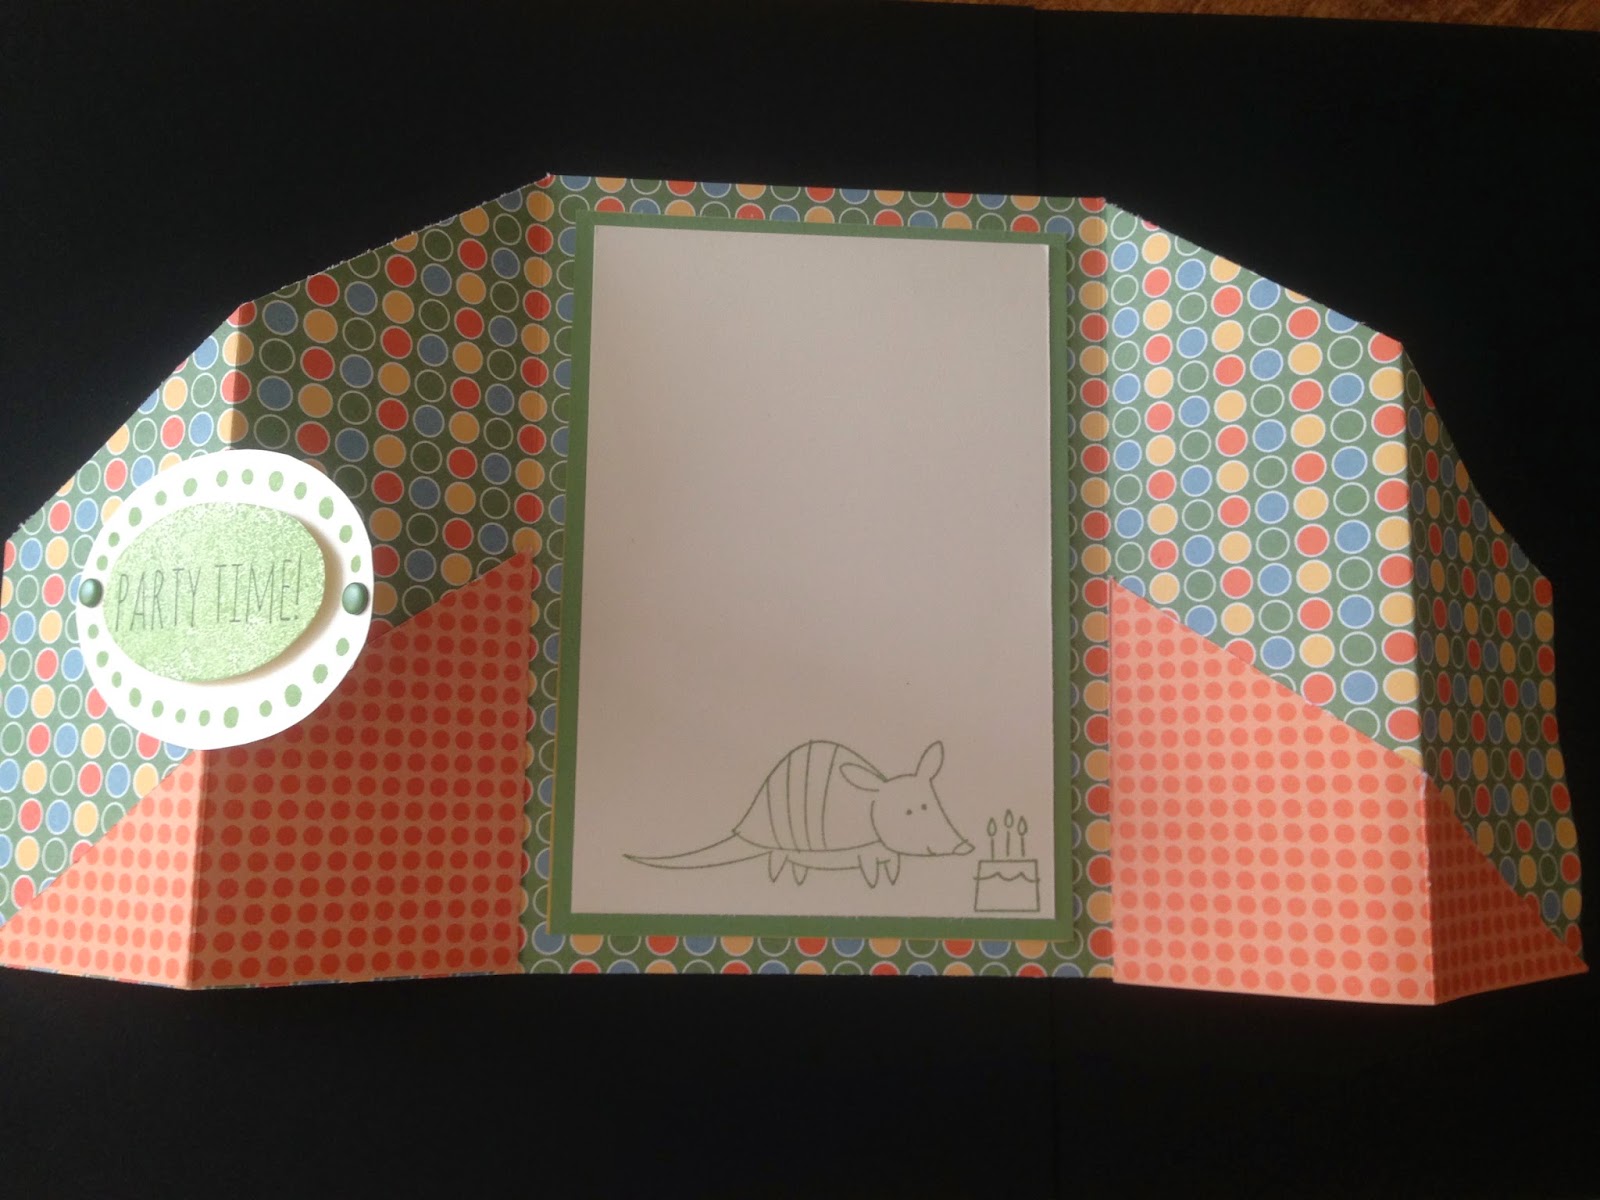
- glue your scraps to the inside of the card, see above, this gives the card more stability when it is standing up and adds some fun to the inside *because it is already scored it will fold easily too

- cut your inside background 3 1/2 X 5 and your Whisper White 3 1/4 X 4 3/4
- stamp your images and you are done!
Isn't it cute? And really not that hard at all! Have fun with it and enjoy your weekend!
Dee-Litefully Yours,
Diana
Tuesday, August 19, 2014
Sweet Treat Box


An other cute box which is going to be great for the little treats that it will hold!

- base cut 7 X 7 square
- score at 2 1/16 on all sides
- Lid, DSP 6X6
- score at 1 1/2 on all sides
- add your embellishments on the top (I used the Flower Patch stamp set at framelits, love it!)
- Ta Da a cute little box!
DeeLitefully Yours,
Diana
Sunday, August 17, 2014
Artful Flower
Single layer cards are not ones that I make very often (and quite honestly in the crafting world you don't see them very often) but todays card gets two huge thumbs up from me! I LOVE it!!!


DeeLitefully Yours,
Diana
Saturday, August 16, 2014
Blooming Birthday

LOVE LOVE LOVE this card!! Yellow is my favourite colour as it just makes me feel happy and brings a smile to my face! Todays card whipped up in now time and would just put a smile on anyone's face.
- cut two pieces of DSP (I used from Lullaby) 4 X 1 1/2 and one solid strip (Hello Honey) 4 X 1 3/4
- Blackberry Bliss 4 1/4 X 2 1/4
- Very Vanilla 4 X 2

- I used my new stamp set Flower Patch (pg 156 AC) with crumb Cake and Delightful Daffodil. I know the paper I used had Hello Honey but when I stamped with it I just found that the stamped colour was a bit to dark for this card so I chose a brighter yellow instead.
- Blackberry Bliss was used for the sentiment and used my Scallop oval punch and a few dimensionals to pop it up
- it is a bit hard to tell in the pictures but I also added rhinstones to the two centre flowers, a little extra happy for this card
Dee-Litefully Yours,
Diana
Thursday, August 14, 2014
Polka Dot Birthday

- Cut four pieces of DSP (two of each) at 2 1/2 X 2
- Crumb Cake sentiment base is 3 X 2 1/2
- Whisper White is 2 3/4 X 2 1/4
- I used the stamp set Delightful Dozen which is now retired but the Remembering Your Birthday set is very close (page 59 of Annual Catalogue)
- I then made a little ribbon tag using the crumb Cake Seam Binding Ribbon - what a soft flowing ribbon to use!
Dee-Litefully Yours,
Diana
Tuesday, August 12, 2014
Make a "new technique"


- take your sponge and dab it into the colour of your choice - here I used Smoky Slate
- holding the piece of paper in one hand brush the sponge down along the edge of the paper, it gives it this weathered look and adds dimension to the piece
- remember to use a different sponge for each colour so you don't get your ink pads mixed, or if you don't have enough sponges just use one sponge for each color family.
I hope you try out this technique because it is super fun and easy and just adds more to your simple cards.
Dee-Lited you joined me today
Diana
Sunday, August 10, 2014
Splatter Thanks

As I have said in the past I have trouble working with the DSP because 1) I find it hard to cut up the pretty paper and 2) some of them are so busy I don't know what to do with them. This paper today is from the Flashback DSP and I really loved the settle look of the paper. I took out my Gorgeous Grunge stamp set and stamped some splatters with Lost Lagoon (love this colour!) and Tangelo Twist a colour that I have never worked with before - out of my comfort zone but I think it turned out okay!A couple flags a piece of ribbon and this card was done - change up the sentiment and this would work very well for a masculine birthday card don't you think?
Dee-Litefully Yours,
Diana
Thursday, July 31, 2014

Wednesday, July 30, 2014

Tuesday, July 29, 2014
Pretty Pink


Great card and thank you again Donna for letting me post it!!
Dee-Lited you joined me
Diana
Sunday, July 27, 2014
Perfect Life

- Cut three flags, large flag Bermuda bay, medium in DSP and smallest in Very Vanilla (I am using this colour more and more and it is really starting to grow on me)
- Stamp your sentiment, using Perfect Pennants and Bermuda Bay in
- Punch our some stars in Delightful Daffodil, put dimensionals on the back
- Add a bow the same colour as your stars
- A couple of candy dots and you are done!
Diana
Friday, July 25, 2014
Soft and Subtle

Biggest change - colour: So Saffron and Pool Party
Small Change - ribbon I made a tail with the new cotton ribbon (man this is great stuff!)
I wanted to show you how a card can look so different just by changing a few small things. I have someone special to share this with today and I just know they are going to love it!
Dee-Litefully Yours
Diana
Thursday, July 24, 2014
Circles All Around

You all by now know my motto "quick and easy!!" The easier the better as we all know with children down-time does not come easily! I had a lot of fun whipping up this card and it came together in 5 minutes!
- background colour is Crumb Cake cut at 5 3/8 X 4 1/8
- Whisper White 5 1/4 X 4
- Moonlight DSP punched with my 2 1/2" circle punch
- grabbed old faithful - Work of Art Stamp set with Lost Lagoon and Basic Grey
- finished it off with Lost Lagoon stitched ribbon (can't even begin to tell you how much I LOVE this ribbon!!)
Dee-Litefully Yours,
Diana
Tuesday, July 22, 2014
Choose Happiness 2

An other one from Sherry today - this card shows that you don't need a lot going on to have a beautiful card. She kept the focal point clustered together which gives punch and the Tangelo Twist and Lost Lagoon make a lovely colour combo
Sorry for the short post again today!
Dee-Litefully Yours,
Diana
Sunday, July 20, 2014
DSP Scraps

Like many of you I have scraps of paper that I save just because it might be big enough for me to use again - its using these scarps that I have trouble with!
This card came together quickly and helped to use up scraps that I had lying around. The DSP sitting on the diagonal just gives this card a little more punch.
As this month is Just Because July I didn't put a sentiment on it so now I can send it to anyone!
Dee-Litefully Yours,
Diana
Saturday, July 19, 2014
All Round Hi


- Cut your DSP and top colour (in this case Bermuda Bay) at 5 3/8 X 4 1/8
- use different size circle punches to make "holes" in your top colour.
- Punch 3/4" circles out of complimentary colours found in the DSP - here Real Red and Early Espresso
- Stamp your sentiment on Very Vanilla (which is also my card base) and punch it out - I also layered it on Real Red just to make it pop again.
This card was fun to make and just by changing the punch shape you will change the look!
Have a Dee-Liteful Day
Diana
Friday, July 18, 2014
Basic Black

This card took no time and at all it looks so elegant doesn't it? I started with a Smoky Slate card base - something I haven't done before - I always have to remind myself that the base doesn't have to be white or vanilla. I added the two strips of Real Red on each side, Basic Black was used on the front.

I am so Dee-lighted that you joined me today!
Diana
Subscribe to:
Comments (Atom)