Showing posts with label Fun Fold Friday. Show all posts

Friday, August 29, 2014

Fun Fold Friday - Quarter Fold

 
Fun Fold Friday again! 
This card is called a Quarter Fold card and it is really very easy to make! And really has such a different look. You will need two pieces of card stock (or if you prefer one piece of card stock and one piece of DSP which would look very cool too!) I used Pumpkin Pie and Delightful Daffodil.
  • Pumpkin Pie (or what ever you chose to be your back colour) 4 1/4 X 11
  • score on long edge at 2 3/4 X 8 1/4
  • Delightful Daffodil 5 1/2 X 8
  • score on long edge 2 1/8 X 6 3/8
  • line up pieces between the score lines (use your Tom Bow glue so that you can get them lined up properly)
  • use to bone folder to crease the score lines both way (this makes folding it in easier)
  • then fold in the left side, bottom, right side and then the top just like you would the top of a box
  • if you wish to add paper to the front of your card cut two at  2 X 2 1/2 and two at 1 7/8 X 2 5/8
  • the inside panel is 4 X 5 1/4
My mother-in-law is coming today and we are having a Birthday party of Don tomorrow with about 25 people coming! Seeing as this is the long weekend, with a party and family coming and the boys starting school on Monday (my middle  boy is staring Kindergarten! Yikes!)I am not going to be posting for a few days. Have a wonderful last summer weekend and I have some SUPER cards for you next month!

DeeLitefully Yours,
Diana

Friday, August 22, 2014

Fun Fold Friday - Lets use some DSP

I am back with an other Fun Fold Friday!I have been having trouble using my DSP as I just don't know what to do with it, so I have made it my goal over the next few months to use up a bunch of my DSP and with cards like this that won't be hard! I have lots of pictures today so lets get to it!
  • DSP cut at 5 1/2 X 12
  • score at 2, 4, 8 and 10
  • fold in at the 4 and 8" marks and then fold back out at the 2 and 10" marks
  • open up the card and measure down 2 3/4" from the top of the card along the outside edges
  • cut from the top of the 4 and 8" marks to where you marked on the outside edge, save your scraps
  • add your outer oval tab and sentiment (I used my new High Five stamp set for this one) and I embellished with candy dots (love those things!)


  • glue your scraps to the inside of the card, see above, this gives the card more stability when it is standing up and adds some fun to the inside *because it is already scored it will fold easily too


  • cut your inside background  3 1/2 X 5 and your Whisper White 3 1/4 X 4 3/4
  • stamp your images and you are done!
Isn't it cute? And really not that hard at all! Have fun with it and enjoy your weekend!
 
Dee-Litefully Yours,
Diana
 

Friday, August 15, 2014

Fun Fold Friday with a Twist

Fun Fold Friday again but this time with a twist, this isn't really a new fold but it is new idea for making a involved card! Todays card was CASEd from demonstrator Lillian Kemp. It is such a cool card and I am super excited to share it with you all today! This card takes a bit more time and finiky work - just to get the circle punches placed properly. A ruler was my friend for this card!
  • My card base is Pool Party (love the soft feel of this colour!) Whisper white background cut at 5 3/8 X 4 1/8, then Flashback DSP (again I know!) 5 1/4 X 4, stick all these layers onto the front of the card
  • You will now want to use your ruler to figure out how far down you want the circles to be - this is all personal choice then punch out using your 1 3/8" circle
  • Also punch out three additional 1 3/8' circles of Pool Party
  • on Whisper White I stamped my Dinoroar stamp set (again retired sorry but my little Evan loves Dinos and I know a lot of other kids that do too!) but Little Buddy Birthday is works great too (page 89 Annual catalogue)
  • once you have them stamped punch them out with your 1 1/4" circle punch and stick them on the 1 3/8" Pool Party pieces
  • to place the dinos in the correct spot on the inside of the card I closed the card and placed a pencil mark where my circles were then I stuck the stamped image on that mark
  • make a flag with your sentiment on it and add a few candy dots and you are done!
This card did take a bit more time than usually (and by a bit more time I mean about 5-10 more minutes) but it was completely worth it!

Dee-Litefully Yours,
Diana
Diana

Friday, August 8, 2014

Fun Fold Friday - and I'm BACK!

Sorry to all of you who came and looked earlier and there was no write up - I had a lovely week off but then when we got back from holidays our beloved dog, Ripley passed away. He was with us for 9 years so I am really feeling the loss and just having a hard time getting things done this week. So I apologize again.
On with the card. This card was actually pretty easy to make. The center square is 4" big and you fold all the corners in to the centre then fold them back out again. You could put any shape in the centre you wished - the card I CASEd for this one had a butterfly which I really liked but I don't have that punch so I had to improvise.

I do have a hard time using the Color Collection DSP because I find them very busy. I thought this card used it very well and helped to "control" the business. A Dozen Thoughts stamp set is quickly becoming a go-to for me - love the small printed phrases!

So again sorry for the delay and I will do my best to stay on the ball now. Rip was an active dog right to the end so that is what I am going to be too.

Dee-Lited to be back
Diana

Friday, July 4, 2014

Envelope Card

Fun Fold Friday is back! So easy and so fun! Us your Envelope Punch board to make an envelope of what ever size you want (mine was made from a 9 X 9 square). I used Rich Razzleberry as I love the deep purple hue.
The inside of the envelop becomes your card, add a belly band around the envelope to keep it closed and you have a fun and different card to send to someone.
 
I want you to note the ribbon on the left hand side - Diana made a mistake with her first score line and didn't want to waste the paper so a few glue dots and some ribbon covered that right up and gives the outside a bit more zing!
 
Dee-Litefully Yours,
Diana

Friday, June 20, 2014

Fun Fold Friday

 Back with an other Fun Fold Friday and I LOVE this card!!! How cool does this look? And bonus - it is masculine!! Notice the stamping I did on the inside so when you fold it you see some fun on the inside too!
 Super easy and quick so here we go!
  • Start with your card and score on the diagonal of the front
  • Add your DSP to the two "triangles" you just made
  • With the Big Shot, cute two circles with complimentary colours
  • stamp your sentiment or image on the smaller circle
  • glue on the bottom right half of the circle and attach to the lower triangle
  • DONE!
This card is so versatile and the look would completely change with the paper and the shape you use for the sentiment (I am going to try it next with the Deco Labels and I am sure it will be Dee-vine!)

Have a wonderful weekend and I will talk to you later
Dee-Litefully Yours,
Diana

Friday, May 30, 2014

Fun Fold Friday

This blogging experience is getting to be a lot of fun! Some were worried (Martha) that I might be trying to do too much by posting every day but really it hasn't been all that bad (spoiler alert: I actually type up a bunch of posts at the same time and then just pick which date I want it to post)

I have decided to start something new!! At least once a month I am going to post Fun Fold Fridays!Can you guess what those posts are going to showcase? Fun Folds! It really is fun to try out different folds and see how you can change up a card just by changing the shape!

 
 I CASEd (Copy And Share Everything) from an other demonstrator, Lillian Kemp. I LOVED the fold!


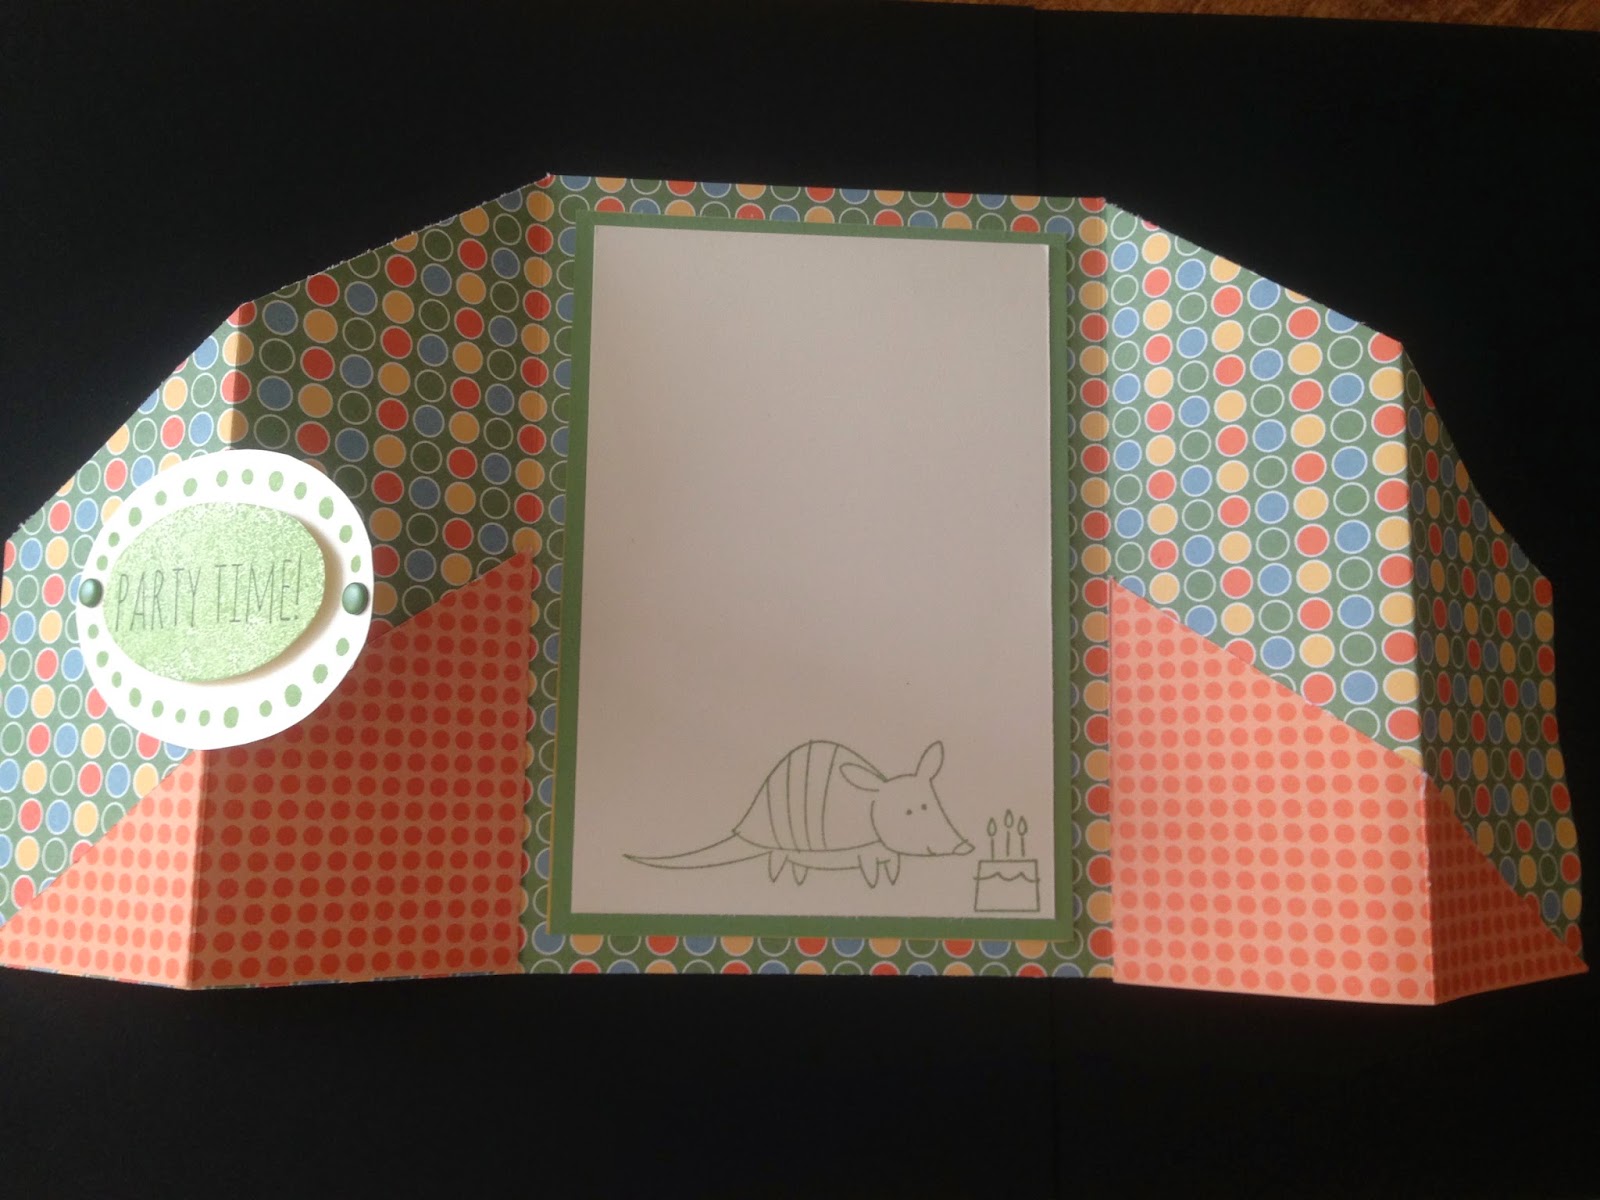
As you can see this card uses a fair bit of DSP but it makes it so fun and alive! Of course you don't have to cover up all the card base for a kids birthday card, I figured the more colors the better! The stamp set is Cool Kid from the Celebrate the Everyday Catalogue which is pretty well done (tear) but don't worry the new seasonal catalogue is right around the corner, well August.


The best thing about this card? It still fits into a standard envelop! YEAH! 
  • Cut the paper at 8 1/5 by 5 1/2 (you can get two for one!)
  • along the long edge score at 2", 3 1/8", 5 3/8" and 6 1/2"
  • fold the two edges of the two smaller triangle towards the inside of the card
  • add your DSP, then using a hole punch, punch two holes where you would like to add your ribbon, run the ribbon through, tie a bow and ta da!
Well there we go. Our first Fun Fold Friday. I think it was a success don't you?
 
Dee-Litefully Yours,
Diana